Trick or treat yourself: Must-try Halloween recipes for a Spooktacular feast
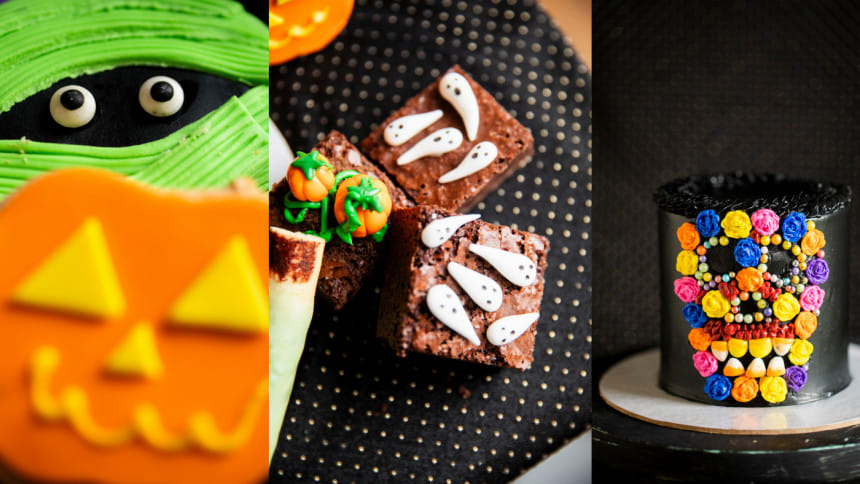
Elevate your Halloween celebration with a bewitching array of hauntingly delightful desserts. Let's embark on a culinary adventure into the world of ghoulish gourmet!
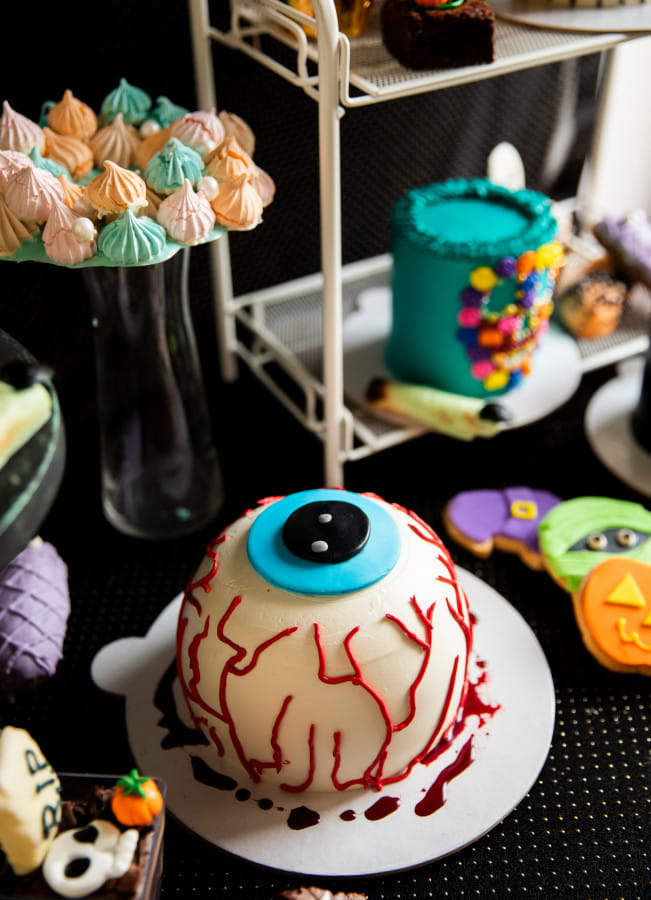
3D EYE CAKE
Ingredients
For red velvet cake base —
2½ cups all-purpose flour
1 tsp salt
2 cups sugar
1 cup butter, softened
2 eggs
1 tbsp cocoa powder
1½ tbsp liquid red food colouring
1 cup buttermilk
1 tsp vanilla extract
½ tsp baking soda
1 tbsp cider vinegar
For cream cheese frosting —
450g cream cheese, softened
1 cup butter, softened
2 tsp vanilla extract
4-5 cups sifted confectioners' sugar
Method
For the cake —
Preheat the oven to 350° F. Grease and lightly flour 2 or 3 round 9″ cake pans.
Sift flour and salt together, set aside. In the bowl of a stand mixer, combine the butter and sugar. Mix until light and fluffy. Add the eggs one at a time. Mix well after each addition. Add the flour mixture to the bowl alternately with the buttermilk, beginning and ending with flour mixture. Blend in vanilla.
In a small bowl, mix the 1½ a tablespoon of red food colouring and 1 tablespoon of cocoa powder until a paste forms. Add to the sugar and butter mixture. Mix well. In a small bowl or condiment cup, stir together the baking soda and cider vinegar. This will foam and should be put into the batter immediately after well mixed. After adding the foam mixture, blend on medium-high speed until the batter is consistent.
Spoon batter evenly into pans — batter will be very thick! Level top of batter with an offset spatula. Bake for 25-30 minutes, or until the cake springs back when pressed in the centre. Turn out on wire racks and cool completely.
For cream cheese frosting —
In a large mixing bowl, beat the cream cheese, butter and vanilla together until smooth. With the mixer on low, gradually pour in the confectioners' sugar. Increase the speed to high and beat until light and fluffy. If the mixture is too thick, add a little milk to loosen it. If it is too thin, add additional powdered sugar or put in the refrigerator to firm up.
When carving cake and coating with crumbs, be sure to put the crumbs on when the icing is fresh and still sticky.
Assembly
You will need —
- Cake board
- Cake turntable
- Spatula and cake smoother
- Red, blue, and black gel food colour
- Swiss meringue buttercream
- Fondant
Place a cake board on a turntable, add a dollop of frosting and place a red velvet cake base over it to help stay in place. Layer with cream cheese frosting. Repeat until you use up all 3 cake bases.
Once stacked, crumb coat using Swiss meringue buttercream to create a cylinder. Keep in the refrigerator for at least an hour.
With a sharp knife, carve the top to make a smooth oval shape — place the knife at an angle. Crumb coat well to finish the shape.
Using swiss meringue buttercream, cover the entire cake and smoothen to make a rounded eye.
Use coloured fondant to create the eye, cutting out the shapes out of coloured rolled out fondant. You will need to colour the fondant and then roll out the dough with a rolling pin and use a circle cutter to cut the parts.
Once cut, place the black circle, then the blue and finally add one slightly large and a smaller dot of white fondant to complete the eye.
Use red buttercream to pipe out the veins around the eye.
Take a bit of the red buttercream and melt it for 5 seconds in a microwave to create the blood around the cake.
Once sliced, keep in an airtight container in the fridge for up to a week.
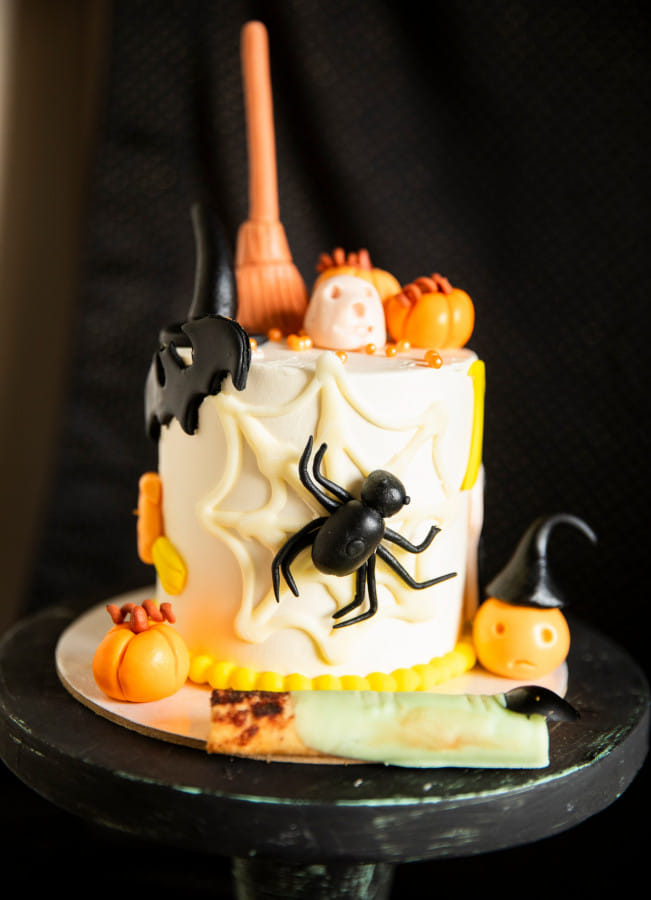
WITCH FINGERLINGS
Ingredients
Breadsticks
White chocolate
Green gel food colour
Fondant
Black food colour
Method
Melt the white chocolate over a bain-marie. Add a drop of green food colour and mix it in to create a spooky green colour perfect for our fingerlings. Dip breadsticks one by one until each is almost covered.
Place on wax paper to cool. Check to see how they are setting and right before the chocolate solidifies, use a knife to add some incisions on to make wrinkles on the fingerlings.
Take a bit of fondant and add black gel food colour. Pinch a bit to create a nail on top of each fingerling. They are ready to eat as soon as they are cooled. Store in an airtight container and refrigerate for a week.
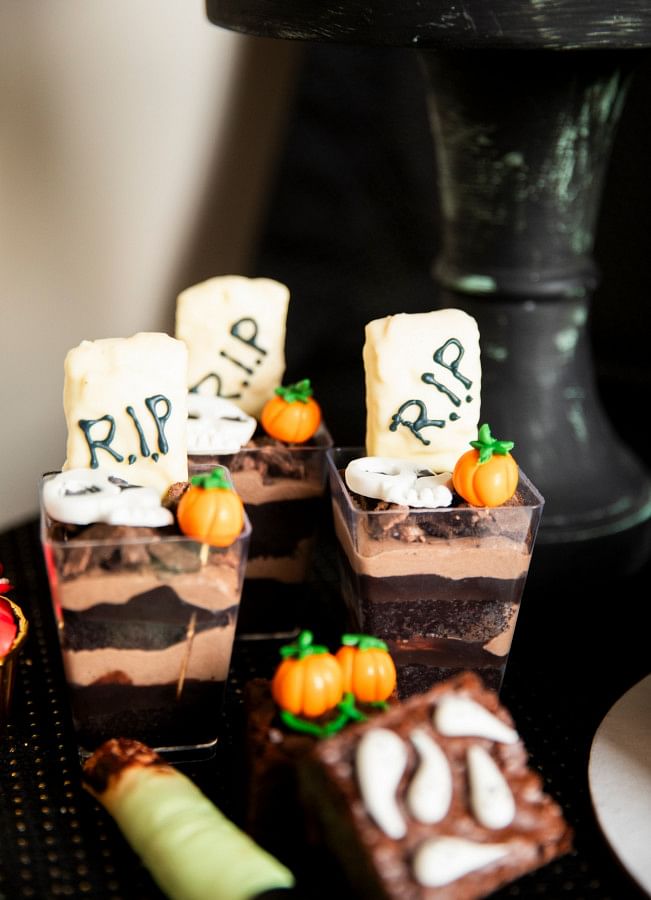
GRAVEYARD CHOCOLATE PUDDING CUPS
Ingredients
For the pudding —
2 large egg yolks
2 tbsp corn starch
2 cup whole milk, divided
½ cup sugar
¼ cocoa powder
¼ tsp salt
2 tsp chocolate extract (or vanilla extract)
Method
In a medium bowl, whisk the egg yolks for about 60 seconds until light yellow and increased in volume, then whisk in the corn starch and about ¼ cup of the milk. Once smooth and incorporated, set aside.
Place the sugar, cocoa, salt, and remaining milk in a saucepan, and bring to a scald over medium-high heat, which is when the liquid is about 180-190° F. This is before the mixture comes to a boil, and in this stage, you will see little bubbles start forming on the sides of the pan.
Remove the pan from the heat and, while whisking constantly, dribble the hot cocoa into the egg corn starch mixture very gradually. We are tempering so we do not scramble the eggs. Pour everything back into the saucepan and cook over medium-high heat, whisking constantly, until the pudding comes to a full boil. Reduce the heat to a simmer and continue whisking for a couple minutes until the pudding is thickened.
Remove the pudding from heat and stir in the chocolate or vanilla extract. Pour the pudding into a bowl and press plastic wrap directly on the surface of the pudding so a skin does not form. Refrigerate for an hour or two until chilled.
Place the cups in a line and cut up cake sponge (see the cake recipe above). Add a layer of cake, then pudding, and then cake and pudding again. Top with a fondant skull, a shortbread cookie with R.I.P piped on it and a fondant pumpkin and serve!
Keep in an airtight container in the fridge for a week
Food & Décor: Saria Saguaro

 For all latest news, follow The Daily Star's Google News channel.




Comments